Search This Blog

Showing posts with label Cooking. Show all posts

Saturday, July 28, 2012

1, 2, 3.. LUNCH!


Mel over at The Larson Lingo is doing a Salad Recipe Swap.


Which got me thinking about my favorite salads...

This is my go-to Summer Salad.
Taco Salad A La Heidi

Salads are so easy. 

Most Salads are Dump, Dump, Serve....and I LOVE that.

Here are the ingredients for My Version...
(this version changes all the time...the basics stay the same, but sometimes it turns into whatever I have in the cupboard.)

1 lb Ground Beef (or chicken, turkey or vegan meat)
1 package of Taco Seasoning
1 can of corn (or two ears of corn de-kerneled and cooked- steamed or grilled)
1 can of black beans (or Kidney Beans)
3 heads of Romaine shredded (or iceberg, or butter/radicchio blend)
1 can of olives (sliced or whole)
1 bunch of green onions (sliced)
2 tomatoes (diced)
1- 2 cups of shredded Mexican Cheese
1 bag of Nacho Doritos
1 packet of Hidden Valley Ranch Dressing (prepared with FULL FAT Mayo and WHOLE milk)
1 jar of Taco Bell Taco Sauce
1 avocado (sliced for garnish)
Sour Cream and Extra cheese for topping


Brown the Meat until fully cooked
add taco seasoning and cook to package directions.

Prepare Ranch Dressing.  Do not skimp on the deliciousness of Whole Milk and Best Foods Mayo.  They are the key ingredients to making this salad perfection.
Take the prepared dressing and remove 1 cup, and add the entire jar of Taco Bell sauce to the ranch until it's mixed. (save the second cup for dipping veggies, or chicken nuggets or pizza)  ;)

it should be a nice rose color and look like this.

Dump all ingredients together, except the chips.
Toss in the dressing.

Just before serving add chips to the bottom of the bowl 
and add the salad to the top. Mix and enjoy.
Top with Guac,  or Sour Cream , or sliced avocado and more cheese! 

Two things make this salad fantastic.  

My super secret dressing and the Doritos. 

Try it tonight!

Happy Eating!

And...

You're Welcome. 

Tuesday, June 5, 2012

1-2-3 Dinner!

I've had some requests.

Some of you would like my recipes. 

And none of you really ask for my fancy pants recipes.... (well...Rose does..)

But the rest of you want my simple recipes.

The ones that when I'm asked for the recipe, I usually say....I don't know...it's in my brain.  I just throw a bunch of stuff together and call it dinner. 

Dump. Dump. Serve.

My kind of Meal.

So...

I thought I would start sharing those recipes.

If you've been my friend long enough, you probably have been served some of these recipes more than once. 

Most of these meals do not have the best presentation, but I promise you, they are crowd pleasers and super easy.

So here you go...

Beef Stroganoff in less than 15 minutes.

Here are some of the basics.  

I use what I have on hand..if I have cream of mushroom, then that goes in, if I have french onion, then that goes in....I know some of you hate mushrooms, so if that is the case then use your favorite "cream of".  Cream of celery works fine too.

In a perfect world, these are the ingredients I use:

1 can cream of mushroom soup
1 can of beef consomme
1 package of gravy mix (prepared)
3/4 cup sour cream (sometimes 1 cup)
1/2 onion diced
1 package of sliced fresh mushrooms
1 clove of garlic
1 lb of ground beef
2 tablespoons of worcestershire sauce
garlic salt and pepper to taste

I can whip this up in no time, but I cheat.

If I have more time, I would put a pat of butter in a pan with a splash of olive oil and saute the onions until translucent, then I would add the mushrooms and brown until tender, adding the garlic once the mushrooms start to soften.
In a separate pan I would brown the ground beef, drain and add to the mushroom/onion mixture.

But let's be honest..sometimes, I am coming off a 9 hour work day and there isn't time...

So...

I turn my favorite deep skillet onto high, throw the beef in until the fat starts to appear, throw the onions in while the meat is still pink and cooking, throw the mushrooms in and then the garlic and let it all cook up at once. By the time the meat is cooked, so is everything else, and the water I have started for the egg noodles is on high and bubbling.  I add the noodles to the water and put the timer on 9 minutes.


Then I start to dump. 

Dump your cream of whatever soup in, then your "gravy" you can use any gravy you want, canned gravy, jarred gravy, gravy you've made from a packet or if you want something lighter, beef consomme- sometimes I use both, a jar of pre-made gravy and a can of beef consomme. Stir it all up until it starts to bubble, add your worcestershire sauce ( I say 2 tablespoons, but really it's however much you like...I never measure, it's usually 3 spins around the pan with the bottle) .  Once the mixture has come together, the final ingredient you add is sour cream.  Let it heat through and serve immediately.
(by now the noodles are done)

It may not look pretty, but I promise you, the men and children in your life will ask for seconds.

We eat ours over rice or egg noodles.

Whatever way you like...

You can make it healthier if you wish, with light sour cream, reduced fat "cream of whatever", ground turkey, ground chicken....but it probably won't be as delicious.  

Here is the ONE rule with my recipes...

Try them just as they are....full fat everything...the first time... THEN ...if you wish...lighten them up later.... But give yourself the gift of full fat your first time around.

Promise me.

And I will promise you that I'll share lots more of my "oh it's just something I threw together" recipes

Enjoy!

Tuesday, October 25, 2011

On the Pinterest Band Wagon!

Mel from The Larson Lingo and My friend Kim inspired me to stop pinning and start cooking.

I mean Pinterest could be one of the greatest inventions I have EVER used, but what's the use of pinning and not trying....

It's like Window shopping....It's fun for awhile, but sooner or later....you gotta just buy it!

I know I have mentioned how much I love my crock pot.

But lately....

I REALLY love my Crock Pot.

My work has been a tad busier than normal.  Which makes my energy level not of it's norm.  

Enter slow cooker.  What better time to break out my Crock Pot than now.  AND what better time than to try all those recipes people have been pinning.

So that's just what I did.

First up: 
With the Holiday's just around the corner I need a breakfast that doesn't keep me in the kitchen and allows me to join in all the reindeer games.
This recipe had me at "Cooks while you sleep" 
Yes! Please!
With Mom visiting this last weekend, I had a sous chef and at 11pm we pulled ourselves up off the couch and threw everything in the pot.

*hint* It is probably a good idea to read an entire recipe prior to starting it just before midnight.

I didn't realize you had to saute the bell pepper and onion, nor did I realize the bacon had to be cooked.
Whenever I'm in a hurry, and don't want the mess, I cook bacon like Ina taught me.  Sheet Pan, cookie rack, 400, 15-20 minutes = Perfect Bacon.

You layer everything and pour your eggs on last.

Here is the finished product.  Not so pretty now, but I added sour cream, chopped tomatoes and green onion and it was great.  Clay even liked it.
*Winner*

and so so easy.
(If I were to change anything, I would add sausage and 1 and a half the recipe so it fills up my pot.)

Next up:
I read Mel's blog and was so bummed that these weren't amazing.  I had such high hopes!
So I did a little google research.
And found a recipe from Sandra Lee.  The goddess of everything semi-homeade. 
Sandra said....Add 1/3 cup of oil.
So that's just what I did.
And they were so moist and perfect. 
Next time I would add some pumpkin spice, just to kick them up a notch.

I iced them with Ina's Cream Cheese Frosting.
Deeelish.

And again...

Easy!

This next one almost all of my friends have made and raved....how could I not try it!

Easy(check), Crowd Pleaser (check), Tender and Delicious (check)
I would recommend. Fo. Sho.

This one seemed too good to be true:
The only thing I added was Garlic Salt, Onion and Hot Sauce.

Clay loved it. 

Hooray!

It was creamy and easy and good!
Topped with Cilantro and Hot Salsa and Sour cream in a tortilla.
Yum!

And Finally.....

This is my old stand by.

You can find Carroll Shelby's Chili mix at your local Grocer.
It's the best.

This week I used Steak instead of ground turkey or hamburger.  
It was so good!

I usually use Chili beans with sauce, Kidney beans, onion, bell pepper, garlic and diced tomatoes with green chilies.

Throw it all in....

And Voila!
Autumn in a Pot.

I serve it with "Corn Puke"
You know....
Like when you go to Chevy's or El Torrito and your dinner comes with that little side of corn casserole. The link above will take you to that recipe.  And I promise it tastes just like the restaurants version.

And if you are not a fan of "corn puke" which means you are probably one of the people that gave "corn puke" it's fabulous name.....you are crazy.  Because it's fantastic. 

So there you have it. 

My Slow cooker, Pinterest, Crocktober, Palooza.

as Mel would say...

FTW.

Enjoy!

Saturday, October 15, 2011

It's Crocktober! (better late than never....)

Welcome to my first Link up!

Mel over at The Larson Lingo is doing a Crock-Pot Recipe swap!

As soon as I saw this post I was so excited.

I love my Crock Pot!

Anything you can Dump a bunch of ingredients to and get something Delicious is alright by me!

So here you go!

As Tegan would say...

My super secret Chile Verde recipe:

The Ingredients:
Here is the best thing about this recipe.  You can substitute and it turns out EXACTLY the same.

Above is what I had in my cupboards today.

Here is what you need:

-1 pork roast 4-5 lbs (I usually use shoulder or butt- but today I used Pork loin and it tasted the same)

-2 cans of Green Enchilada Sauce I usually use La Victoria, but I only had Fresh and Easy's brand and it tasted THE SAME)  (***also- I did not have 2 cans, so for liquid factor, I used one large can of enchilada sauce, and one can of broth and it still worked great!  Just a tad on the milder side.)

-2 onions sliced. (today Fresh and easy was having a sale on their fajita pre-sliced onions and bell peppers.  I picked up two packages and used that instead of the onion to see how it would taste- and Surprise! Surprise!  Just as delicious!)

-6 cloves of garlic-

-2 bottles of Green Taco Sauce or Green Salsa (today I used 1 bottle of La Victoria Green Taco Sauce, and 1 Jar of Fresh and Easy's Salsa Verde)

-1 can of ortega green diced chiles


1 bunch of cilantro-Chopped
1 bag of shredded mexican cheese
sour cream
your favorite salsa
1 diced tomato
1 bunch of green onions chopped

Flour Tortillas

Okay.....

I know this sounds like a ALOT of ingredients....

but this recipe is SO easy.

Here are the steps:

Placed the sliced onions(or fajita mixture) in the bottom of the pot, add one can of enchilada sauce (or in this case broth) before you add the roast.  Place the roast on top of the vegetables, add sliced garlic (you could even add the garlic whole-it won't matter after it has cooked for hours), sprinkle the green chiles, then pour the second jar of enchilada sauce on top of the roast until you can no longer see the roast

Like this

Then set your pot to the longest setting- 8 hours, or leave on low for 8-10 hours.

When you check it after 8 hours it will look like this

Take the entire pot and pour into a colander to get the excess liquid off.  Then take a fork and shred the pork, while it is in the colander. When almost all the liquid is gone, place the shredded mixture back into the pot. And add the two jars of Taco Sauce and Salsa.

This is what your finished product should look like.  It only needs a few more minutes to warm through once you add the taco sauce.

It can stay like this for quite some time, which makes it a great make ahead party meal!

Place the mixture in a flour tortilla and add your favorite toppings

I like mine with Tomato, Cilantro, Cheese, Sour Cream, Lettuce and Salsa!

You can easily feed 10 people or more with this recipe!

There it is!  My first Link up!

Enjoy!!


<a border="0" href="http://thelarsonlingo.blogspot.com/search/label/crocktober" target="_blank"><img src="http://i112.photobucket.com/albums/n191/mlarson17/crocktober2copy.png
" /></a>


(I have no idea how to link up to this.....How come Kim could figure this out and I can't??)

I had every intention of linking up on Wednesday and blogger didn't do my automatic post....so there ya go....better late than never....and un linked....  I guess my first Link up didn't go as well as planned!


Tuesday, August 16, 2011

Get your Skinny On!

With someone's wedding just around the corner....

It's time to get my skinny on.

Clayton and I are back at Weight Watchers.

Tonight I made this:

It tasted as fattening as it looks.

It was so good. AND it took me almost no time to whip up.  My friend Laura is always telling me that my recipes are too complicated.  But this one, is a no brainer, it tastes delicious and is SUPER easy to make.

So here ya go!


Mexican Stuffed Peppers


-1 can of Chili Beans ( I used S&W Chili Beans- pinto beans, chili peppers, onion, garlic in a tomato sauce.)
-1- can of Diced Tomatoes ( I used S&W Diced Tomatoes with Green Chile's added)
-1- 12 ounce package of Veggie Protein Crumbles ( I used Lightlife Smart Ground Mexican Style)
-1-tsp olive oil
-1/2- onion Diced
-5- Bell Peppers- 4 with the tops sliced off like hats, 1 diced
-1- clove of garlic chopped
-3/4- cup mushroom diced
-1/2- Cup Shredded Reduced fat cheese ( I used Sargento Mexican Style Shredded)
-1/2- Cup Low Fat or Fat Free Sour Cream
-1/4- Cup Green onion (for garnish)

Saute the garlic, onion, bell pepper, and mushroom in olive oil until onion is translucent and bell pepper is soft.  8 to 10 minutes.  Add tomatoes and Veggie Protein crumbles- heat for 1 to 2 minutes and remove from heat.  Take mixture and fill the remaining 4 Bell Peppers.  Place tops that you sliced off the bell peppers back onto the filled pepper.  Place in baking dish.  Pour the can of chili beans over the peppers and fill the bottom of the baking dish.  Cover the baking dish with aluminum foil and bake for 30 to 40 minutes @ 375.  

Remove from oven when Bell Pepper is golden and soft to the touch.  Top with Cheese, Sour Cream, Green Onion- Whatever you like!  I had mine with Cilantro and Salsa!  

That's it. 

Easy Peasy.

And here is the best part.

Without Added Toppings one Serving has....

5 grams of fat
255 Calories
17 grams of protein

and for your fellow Weight Watchers out there.....

5 points.

Not bad...

And I'm STUFFED.

Ingredients make a big difference...

These items are what made this dish delicious.

Try this soon!

And don't be afraid of the Veggie Crumbles.  I GUARANTEE whoever you serve this dish to, will not know this is Tofu. 

And....

For those of you who don't like mushrooms, substitute squash, or zucchini!

And for those that are REALLY crazy and don't like onion....  :)  Substitute with canned green chiles. 

Happy Cooking!

If you have a recipe to help me get my Skinny On.....I'm all ears!!

Wednesday, April 20, 2011

So Fresh AND So Easy!

Let's Talk Grocery Shopping....

I love a Bargain.
I love finding All Natural products
and 
I love not having to drive far to get either.

I could not have been more thrilled when I saw this:

I first was introduced to this chain of grocery stores when we went to Manhattan Beach the Summer of 2008.  

Here's why I love this store.

This store coming to our neighborhood means that Fresh and Easy donated $1000 dollars to our Neighborhood.

Love. That.

Also their add ALWAYS has a coupon.

Always.
Love. That.

They have Family parking right up front.
So Nice!

They also have delicious pre-made meals-
Everything from Pad Thai Noodles to Cheesy Mac and Cheese.
and....
if they don't sell immediately....

They go on their 50% off section.

All items on the day they expire go to 50% off.
Everything:
Fruit, Vegetables, Salads, Breads, Baked Goods.
Everything.

It's the busiest aisle in the store. 

Tonight on the way home from work I swung by Fresh and Easy.
Went straight to my favorite bargain aisle....
I bought a family sized Lasagna, Caesar Salad, and  Il Fornaio's roasted Garlic Bread
All for $5.58
Dinner for 4 under $6.
What's not to love???

But the #1 reason I love Fresh and Easy.....
Every item that has the Fresh and Easy Logo on it is made with %100 natural products.
Which makes it incredibly easy to shop for Jack and his diet.

Their Mac and Cheese has pureed vegetables in the sauce...which is fantastic for my picky eater.

The Mini Pizzas have a full serving of milk, vegetables and the crust is 100% whole wheat.
So awesome.

Fresh and Easy makes me feel like a good Mom.
I'm feeding my children healthy products, and I'm saving money while I do it. 

Thank you Fresh and Easy for moving in!

I'm glad we're neighbors!

Monday, January 3, 2011

Move over Cheesecake Factory....

So....

I'm not a baker.   By any means. 
I have always been a cook. There is no exact science to cooking, I can improvise-throw in a little of this and a little of that-and it will still be delicious.  Baking is so precise.  And I hate following the rules.....

But....

this weekend for Gram's B-day...

 I made this:
White Chocolate Macadamia Nut Caramel Cheesecake

Oh. My. Lord.

I was so proud of myself.

I knew I wanted something new to surprise Gram with for her Birthday dessert.  

I recently had lunch at the Cheesecake Factory and had a slice of their version.  As I was enjoying every mouth watering bite, I thought to myself, I wonder if I could recreate this....

So I went home, googled the recipe and found it from a fellow blogger!

If you would like to try it, you can click here.

Someone did all my dirty work for me and re-created the recipe!  So nice!  

It really was quite easy, I followed her instructions to the "T". 

Although my professional baking sous chef (Mom) was right by my side to help me just in case I had a baking emergency......

it still turned out just like the Cheesecake Factory's version!

Mom kept saying that she didn't like cheesecake.
But I found her sneaking in a whole slice!!

Here is the finished product complete with Caramel and Macadamia nut topping....
This Cheesecake is A-M-A-Z-I-N-G.

Make it at home and impress your friends.

It even got Grams seal of approval!

Happy Baking!

Friday, October 8, 2010

Cooking 101

In October of 2004 I was accepted into the California Culinary Academy in San Francisco.  I remember calling Rose on my way to the interview, nervous and excited.  I couldn't believe I was going to try and do something with my passion.  I went to the interview and was accepted.  I was thrilled.  Then reality hit.  Tuition.  Boo Tuition.  I even was accepted into the scholarship program the Academy offered and would have only had to come up with half.  Half an arm and leg.  But still, only half.  Clay and I talked a long time about me going to cooking school.  He wanted me to follow my passion, but I had no idea what I would do with the degree. So after much turmoil, I declined the offer.

About the same time of my acceptance letter, Gram was remodeling her kitchen.  She was purchasing a 5 burner Viking range, direct from Viking.  When she went to purchase her range, they gave her two vouchers for cooking classes at their Viking cooking school called Home Chef.  There happened to be a school in Walnut Creek.  Gram understanding my disappointment in not going to "real" cooking school, handed me the vouchers to "pretend" cooking school.  Thus started my hobby of cooking classes once a month.

I learned so many things.  How to hold a knife, correct terms for certain processes, why we use salt, what it means to braise, simmer and sweat.

 Each class brought new knowledge and skill that has turned me into the cook that I am today.

At my second class I met Candace.  She is a true kindred spirit.  We clicked immediately.  I have not taken a single cooking class without her since the day we met.  It just would not be the same.  We have so much fun, and usually are scolded for being the two in the back goofing off (I swear I have learned a lot!).

Viking Home Chef has since closed it's doors.  We found private courses from independent instructors, and have had a few courses through Williams Sonoma, but none have really provided us the knowledge or hands on training that Viking did.

We decided to try a new school.

Tonight was my second class at a local cooking school held in the rear of a store called Pans on Fire.

The instructor has a background in food anthropology and is very knowledgeable on the history of food. Which is fun.  Instead of just technical skills, you learn why tools get their name, and why a food is made the way it is.

Normally I go alone, but I thought it would be nice to invite Gram.  So tonight we drove down to Pleasanton for Grams first cooking class with me.

Only took 7 years and this menu to get her to say yes:

Oktoberfest

Biersuppe (Sharp Cheddar and Ale Soup)
Amish Pretzels
Gurkensalat (Cucumber Salad)
Rotkohl (Braised Red Cabbage)
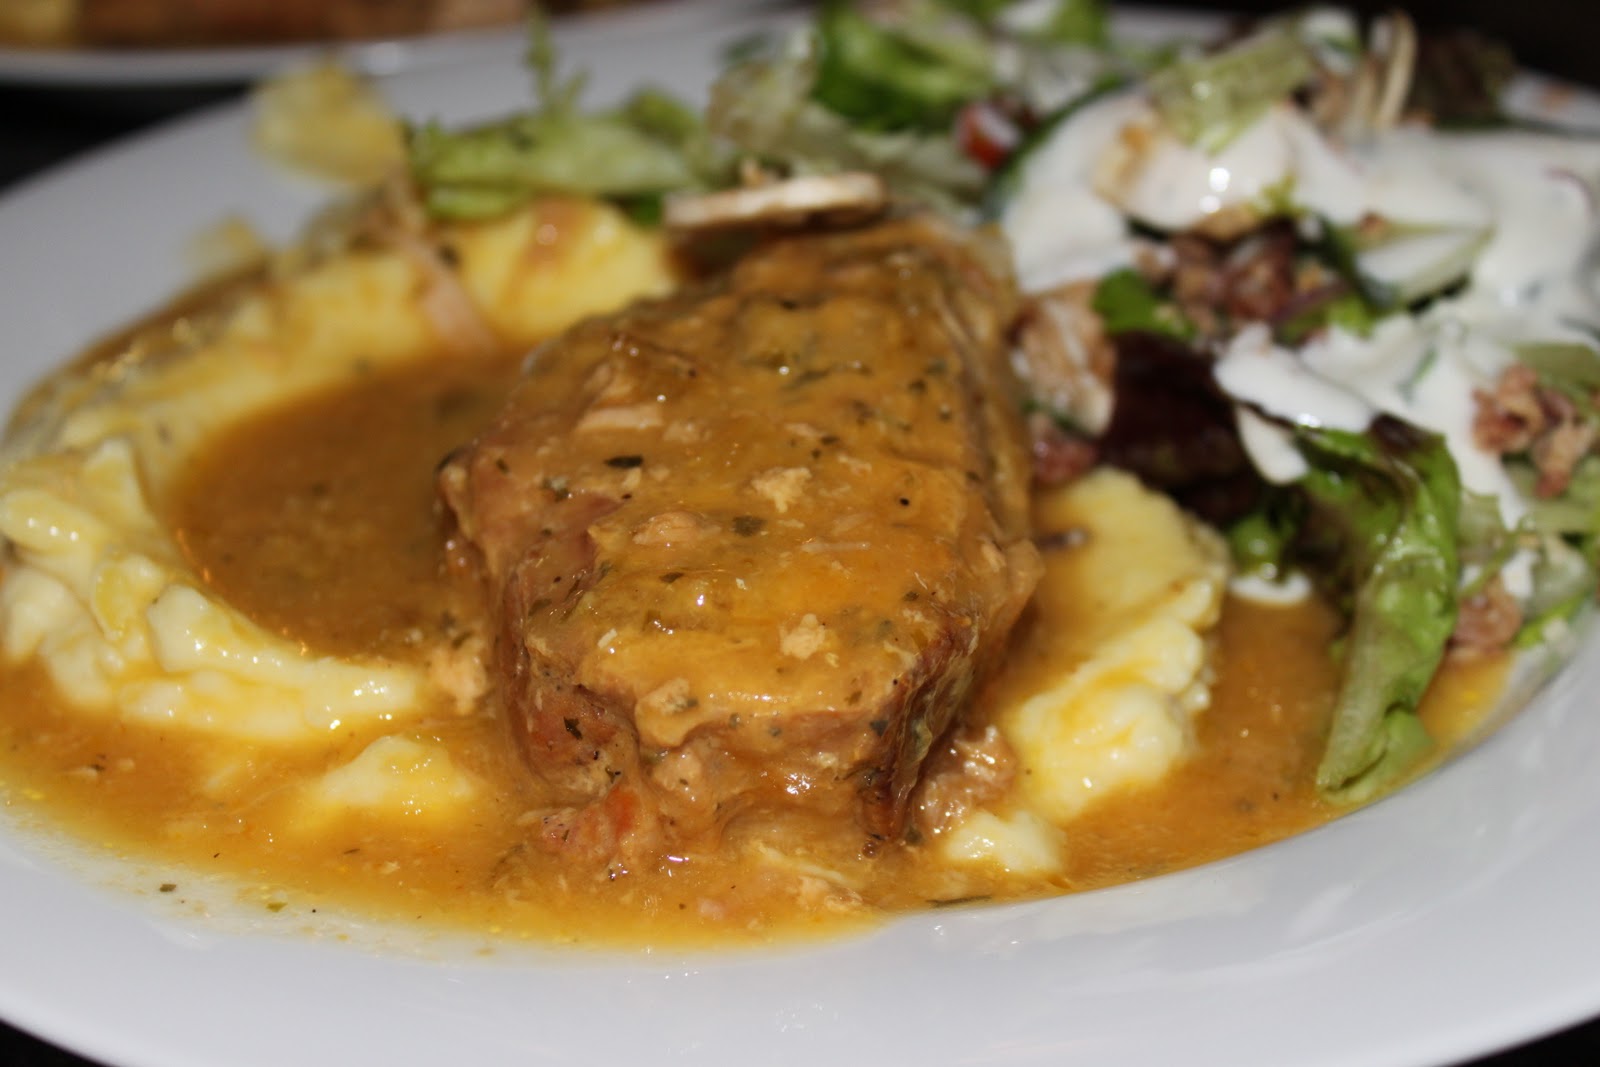
Rouladen(Stuffed Beef rounds)
Spaetzle (Small Dumplings in browned butter)

And for Dessert

Fruit Kuchen ( Plum tart with custard)

Here are some action shots from the night:

Hefeweizen and Sharp Cheddar for the soup

Candace working hard preparing the cheese
Gram browning the croutons for the soup

Rolling our homemade pretzels
Before....

After....

Words cannot describe how delicious this soup was....

Gram especially loved the first course.

prepping the beef rolls
Browning...
braising the cabbage....
Starting the Kuchen
Sliced, ready for the dough and custard

Good to the last

Bite!

Gram said she would pass on dessert...

hmmmm...that's not MY hand...

So much fun! 
(they are going to hate this picture... but it's the only one we took of all three of us.....  Love you both! )

Gram was pooped, But she made it through the whole class! 

Yay Gram!

What a treat to spend the evening with two of my favorite ladies doing what I love most!

Looking forward to next months adventure!

Mmmmmmm Turkey....